

Filed under: Audio & Video Workflows · Free Creator Software
Updated October 10, 2026. Want a soft background without rebuilding your whole video? We tested WebUtility’s Video Background Remover on a short portrait clip. Here’s what worked, where it stumbled, and what to check before using the export. This is one recorded test; the interface may change.
1. Open the tool and choose a short clip
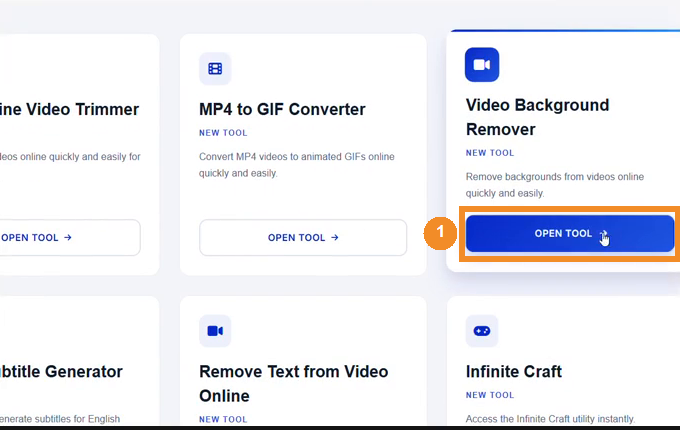
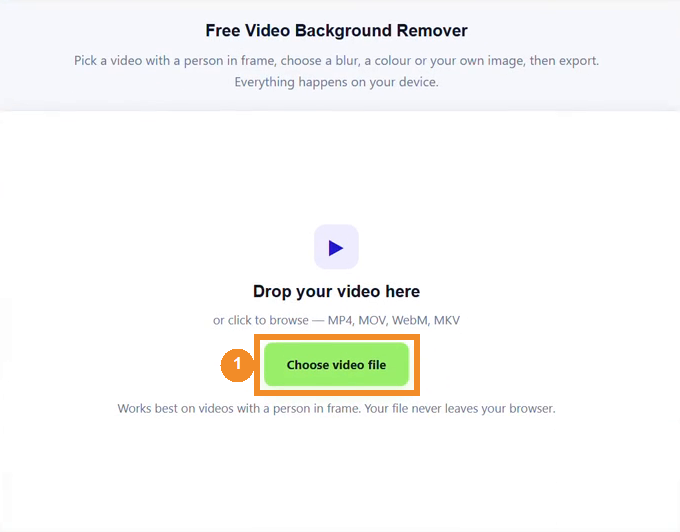
On the tool page shown in our recording, click Open Tool on the Video Background Remover card. When the upload screen appears, choose Choose video file and select a short clip with a person in frame. The recorded screen lists MP4, MOV, WebM, and MKV as choices; that reflects the interface in this lesson, not a guarantee about its current support.
2. If the preview is black, try the workaround from our test
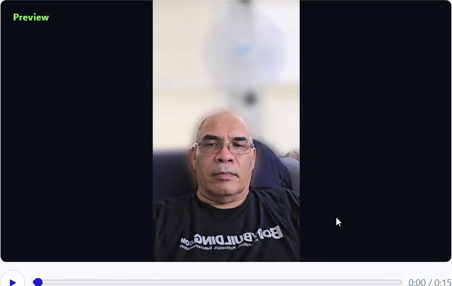
Our first preview stayed black. In the lesson, the source clip was converted from HEVC/HDR to H.264 MP4; the converted copy then appeared in the preview. The recording shows the before-and-after result, but not the converter’s menus, so there’s no honest click-by-click conversion path to copy here. If you hit the same problem, convert a copy with a tool you already trust, then load that copy and check that the preview actually plays.
3. Choose Blur and check the settings
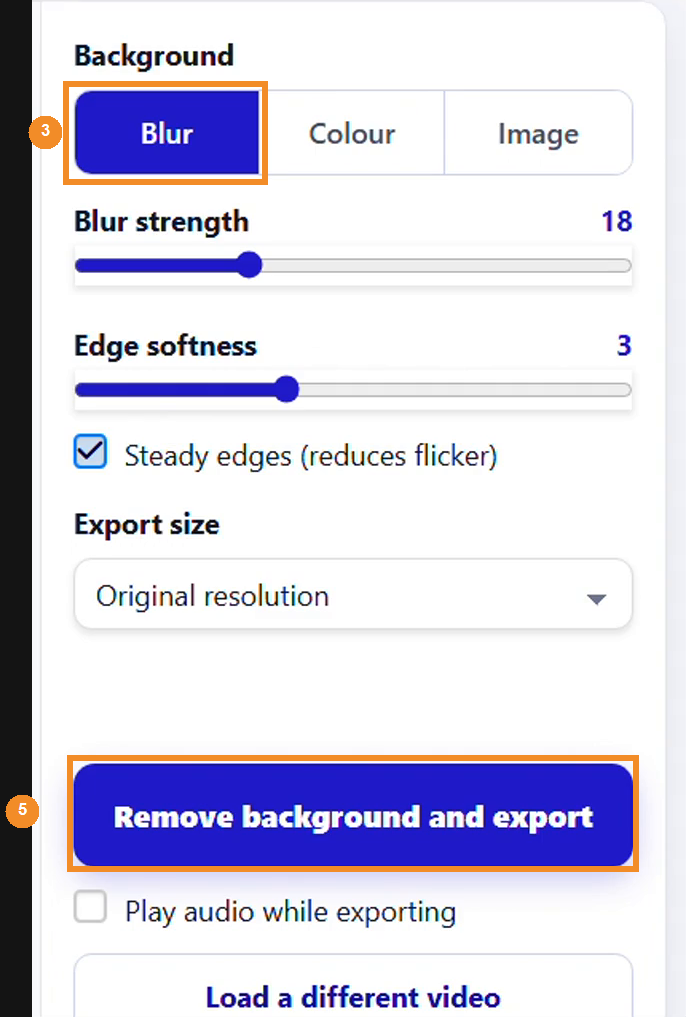
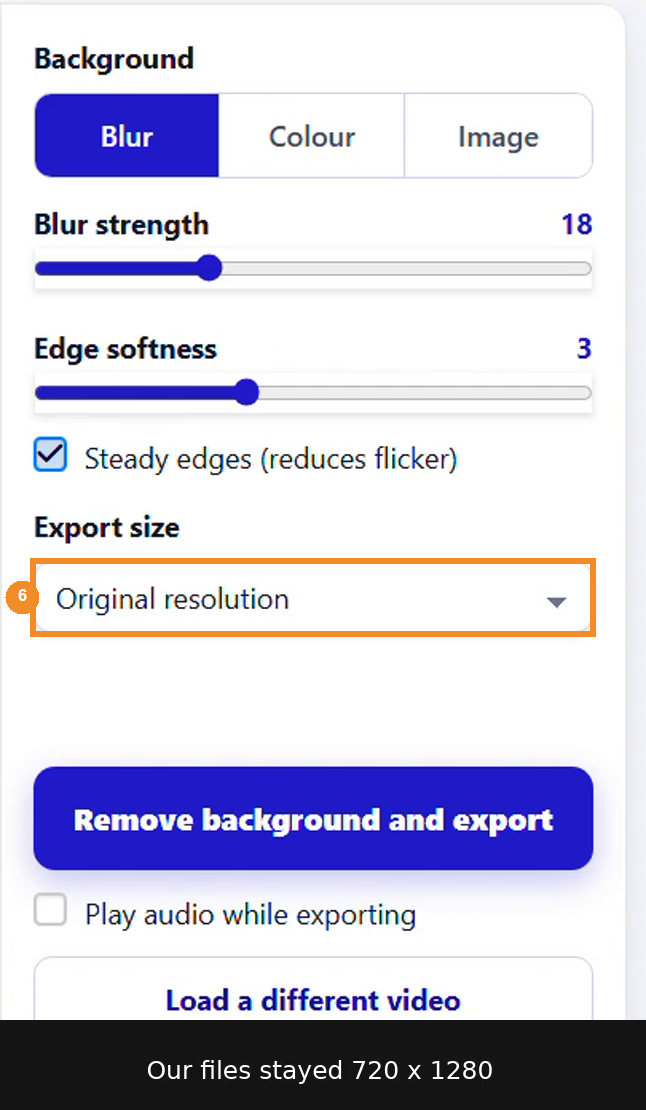
In the Background panel, select Blur. The panel also has Blur strength and Edge softness sliders, plus a Steady edges checkbox. Our recorded test shows strength 18, edge softness 3, and Steady edges checked. Those are the settings used in this run, not a magic recipe; watch the preview and adjust for your clip.
4. Watch the edges while the subject moves
Play the preview and look around the hairline, glasses, shoulders, and hands. The background softened, but the edge around the subject stayed fuzzy in our test. A still frame can be flattering; a moving hand tends to be a more honest reviewer.

5. Export and keep the tab open
When the preview looks acceptable, click Remove background and export (orange 5 in the settings image above). During our run, the app showed a progress bar and said the removal runs in real time, so it asked us to keep the tab open and visible. Let it finish before moving on.
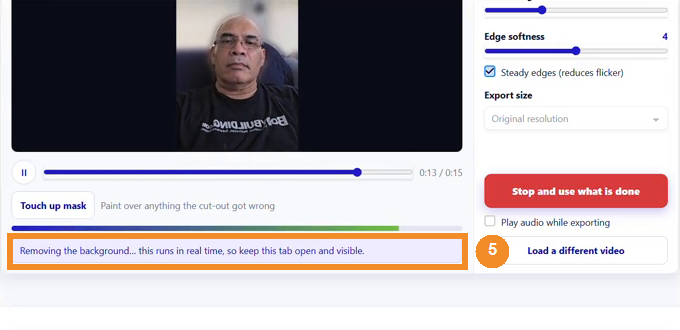
Once the export is ready, download the result. The lesson tells viewers to download it, but the download control itself isn’t clear enough in the recording to name its exact label.
6. Play the saved file and check the result
Open the downloaded copy in your usual video player and watch the beginning, middle, and end. Check that the background stays blurred and that the subject’s outline doesn’t break up during movement. Also check the saved file’s dimensions rather than assuming Original resolution means the size you expected. Our on-screen test note says the export stayed at 720 × 1280; the lesson reports playback at about 11.6 fps. It doesn’t show a file-properties window, so the exact clicks for reading file details weren’t recorded.
Troubleshooting
- Black preview: our workaround was to convert a copy from HEVC/HDR to H.264 MP4, then load that copy. The converter steps weren’t recorded.
- Soft edges: inspect hair, glasses, and moving hands in playback. Our result kept a fuzzy boundary.
- Unexpected size or choppy playback: check the saved file’s dimensions and playback, not only the in-page preview. Our recorded output was 720 × 1280 and about 11.6 fps.
What worked for us
The tool produced a blurred-background export without a new subscription in this test, but the edges weren’t clean and the exported playback was slower than we wanted. It’s worth trying with a short, replaceable clip first. The fan behind me blurred nicely; my glasses were less impressed.
Prefer to watch the demonstration?
The written lesson above contains the essential steps and test results. The complete video is here if you’d rather watch the workflow.