

Change a toolbox’s color. Replace a key. Then check everything you did not ask AI to touch. This screenshot lesson follows our FLUX 3 Image Klein video and shows the actual prompts, two successful edits, and one text request that returned an error.
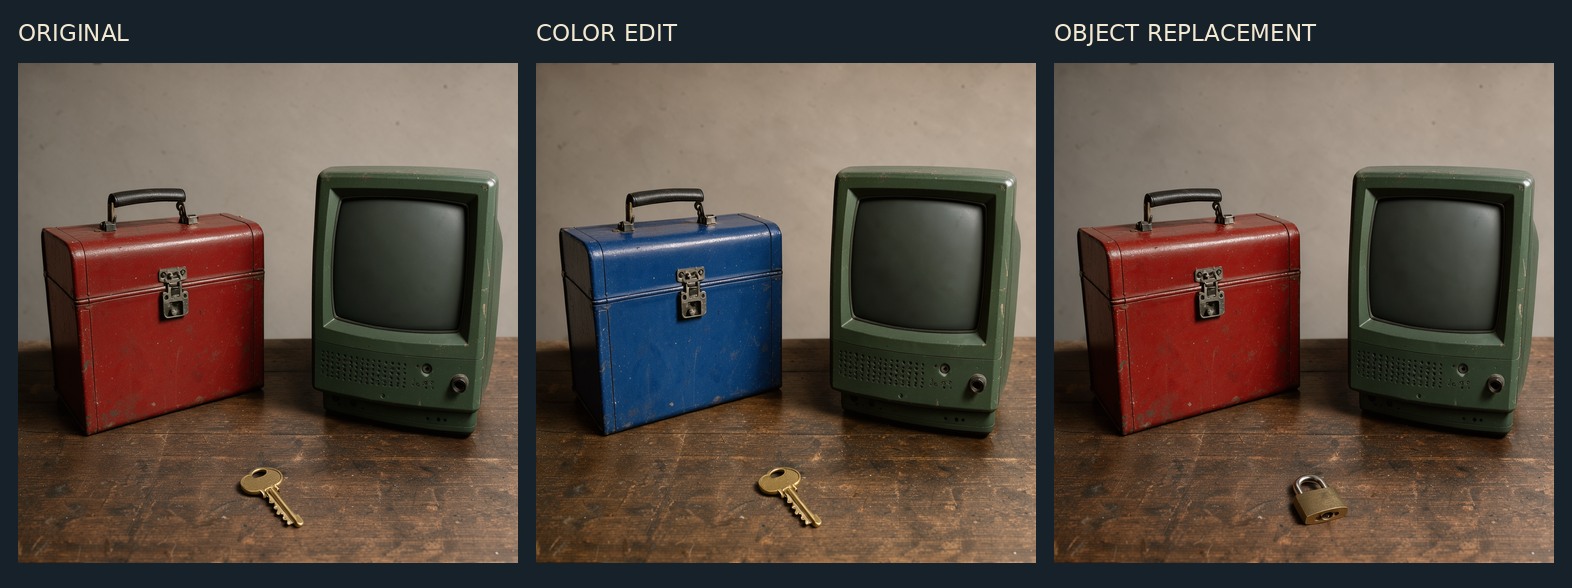
The result: the toolbox became blue and the key became a padlock, but fine details also changed. The useful skill here is learning to judge the whole image after an edit. A correct blue toolbox is only half the check.
Watch the lesson, then follow the screenshots
Watch the full FLUX 3 Image Klein lesson on YouTube. The video uses actual demo screenshots and saved results with narrated comparisons; it is not an uncut recording of every generation.
Before you start: keep one clean original
You need a browser and a reference picture. To follow our exact example, open the original practice PNG and save it to your device. It is 1024 × 1024 pixels, about 1.4 MB, and contains a red toolbox, a blank green monitor, and a brass key. The scene is AI-generated and fictional.
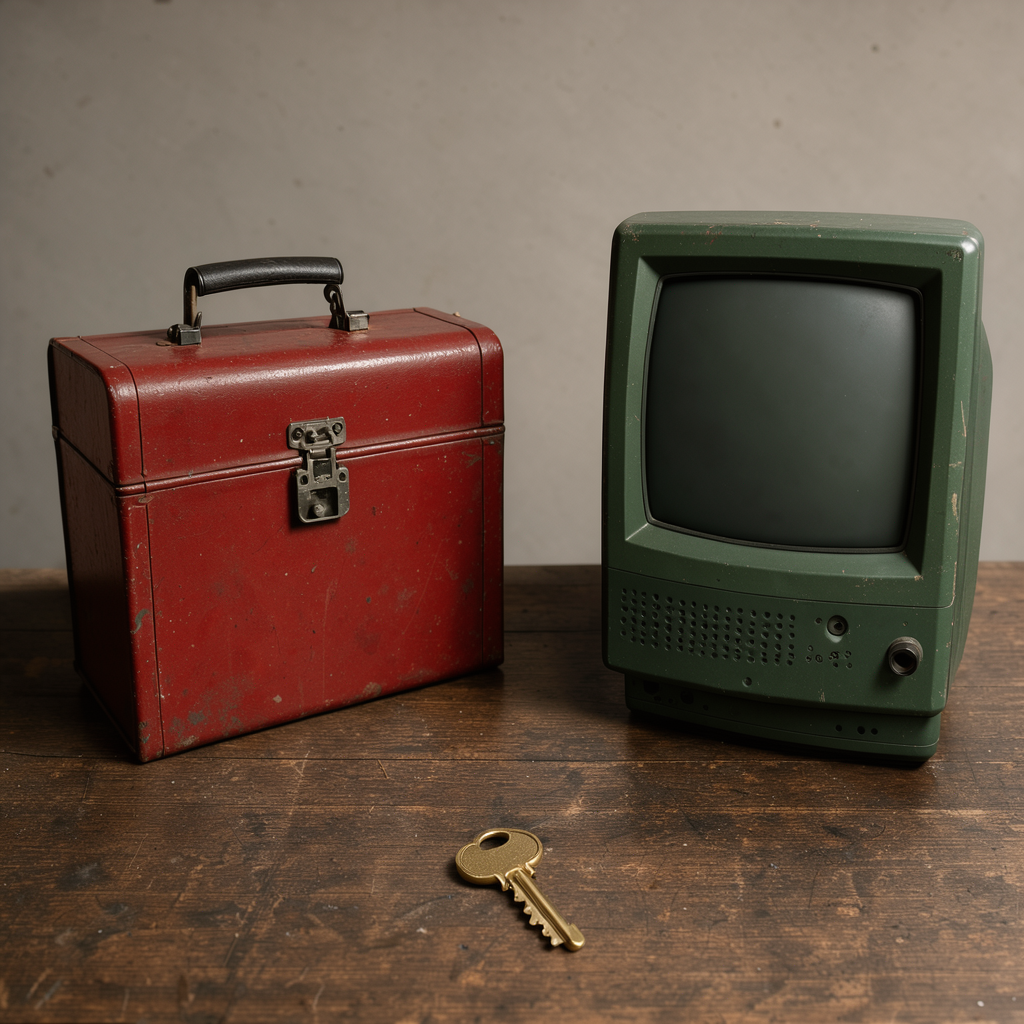
Our tests ran on October 15, 2026 in Black Forest Labs’ official Hugging Face demo, without a new account, payment, or local installation. Shared demo queues, GPU quotas, and sign-in requirements can change. This walkthrough does not promise unlimited free generations. The setup screenshots were captured again on October 16 using the same reference and prompts; no new generations were run for those captures.
1. Open the demo and upload your original
Open the official FLUX 3 Image Klein demo. Choose Generate & edit, expand Reference images, and click the upload area or drop in the original PNG.
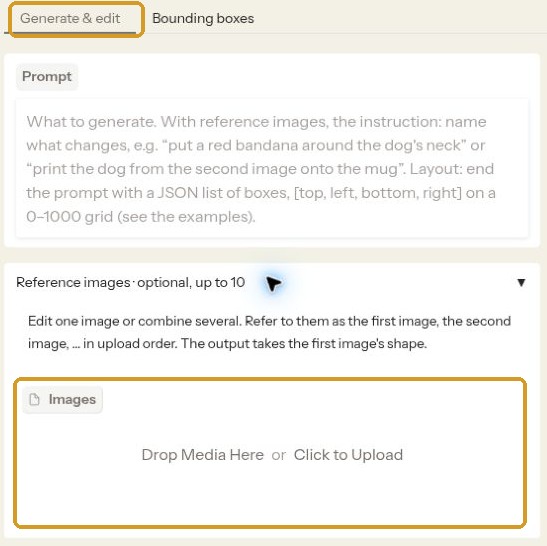
Check before continuing: your reference thumbnail should show the red toolbox, the blank monitor, and the key. With no reference attached, you would be asking for a new picture rather than editing this one.
2. Match the test settings
Choose Distilled (16 steps), Auto aspect ratio, and 1K resolution. Auto follows the square reference in this example. Our two saved outputs are both 1024 × 1024 pixels.
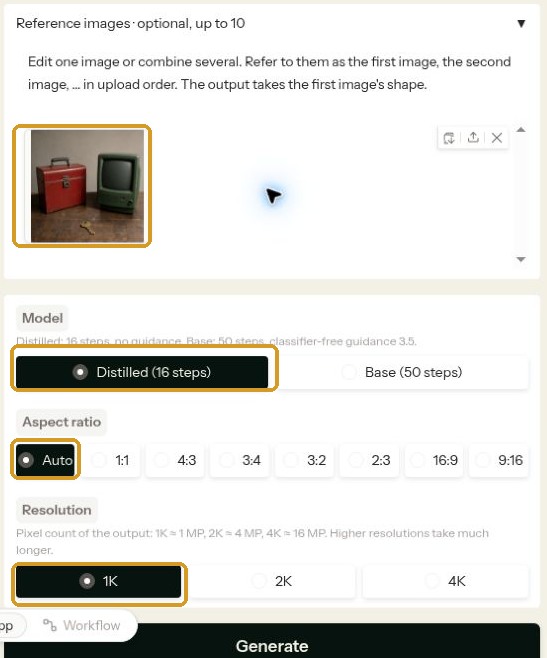
Under Advanced settings, Prompt upsampling was enabled in our session. The app displayed an upsampling stage, so it may have expanded the wording before generating. We did not capture the complete rewritten prompt. These steps reproduce our submitted instructions and visible settings, not a guarantee of an identical output.
3. Ask for one color change
Paste the following into Prompt. It names the object, the exact change, and the things we want preserved. Then click Generate once and wait for the run to finish.
Edit the supplied reference photograph. Change only the painted red metal body of the toolbox on the left to cobalt blue, retaining its scratches, black handle, silver clasp and original shape. Keep the green CRT monitor, blank screen, brass key, wall, wooden workbench, framing, lighting and shadows unchanged. Do not add, remove, move or resize any object. Return the same square photograph with only the toolbox paint color changed.
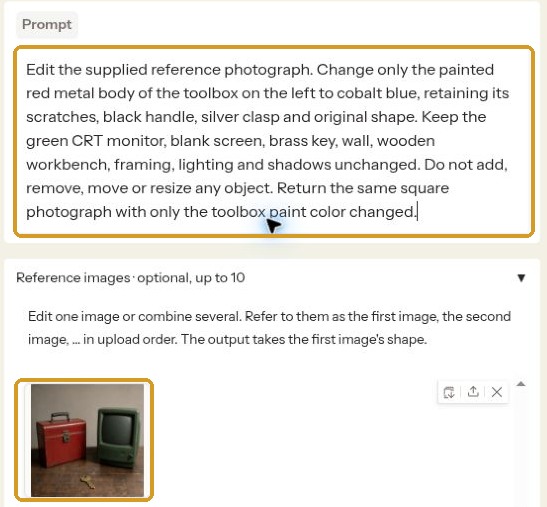
Expected edit: blue paint on the toolbox’s metal body, with the black handle and silver clasp still present. “Keep everything else unchanged” expresses the goal; it does not lock those pixels.
4. Compare the whole result before celebrating
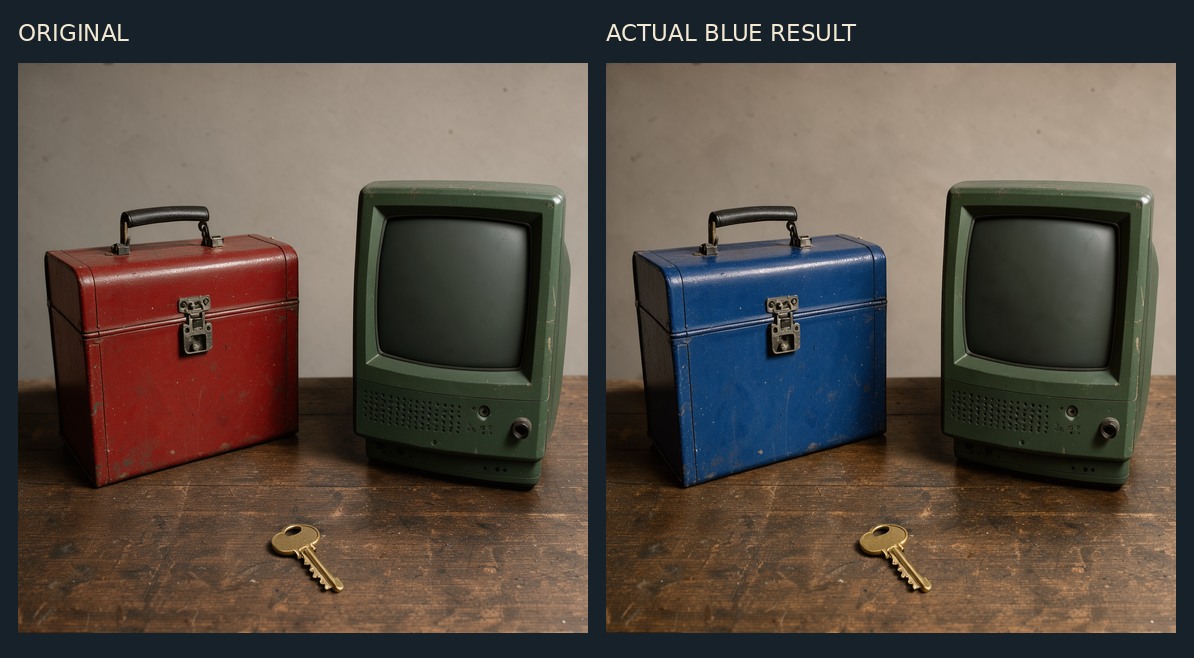
In our first output, the toolbox became cobalt blue, while the green monitor and key remained in the same broad composition. Start by checking those three objects. Then look at the wall, workbench, lighting, and shadows. Do any objects disappear, change shape, or move?
Our result: the requested color change worked on the first generation. The rest of the photograph remained recognizable, but it was not preserved exactly. Click any comparison image in this lesson to inspect its larger version.
5. Zoom in on scratches, edges, and hardware
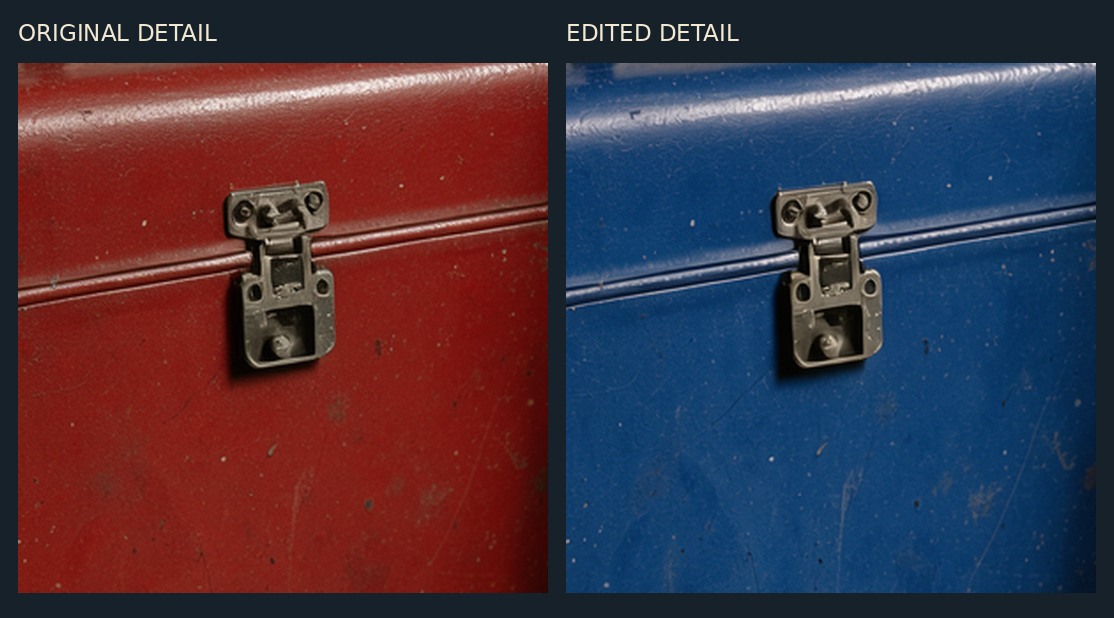
The enlarged crops show why a quick glance is not enough. The clasp is recognizable, but the surrounding scratch and wear pattern shifts. Compare the same small area in the original and the output at a similar zoom; otherwise, a change in viewing size can hide the differences.
Use three questions: Did the requested edit happen? Are the other objects still correct? Did important fine detail change? A casual concept image and a product photo with a specific latch may need different levels of accuracy.
6. Return to the original, then replace the key
For a separate test, keep or reload the original red-toolbox image. If another image is attached, use the reference thumbnail’s remove control and upload the original again. Confirm the thumbnail shows the key. Do not use the blue result as this test’s starting image.
Replace the prompt with the following, then click Generate:
Edit the supplied reference photograph. Replace only the single brass key at the bottom center with one small closed brass padlock lying flat in the same place. Preserve the red toolbox, green CRT monitor and blank screen, wall, wooden workbench, framing, lighting and shadows. Do not change, move, resize or remove anything else. No lettering or additional objects.
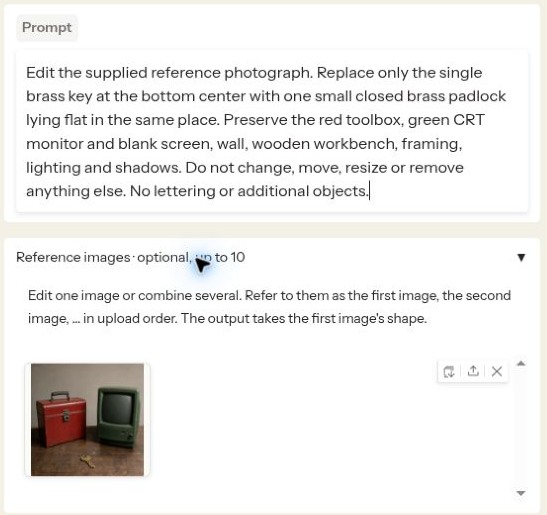
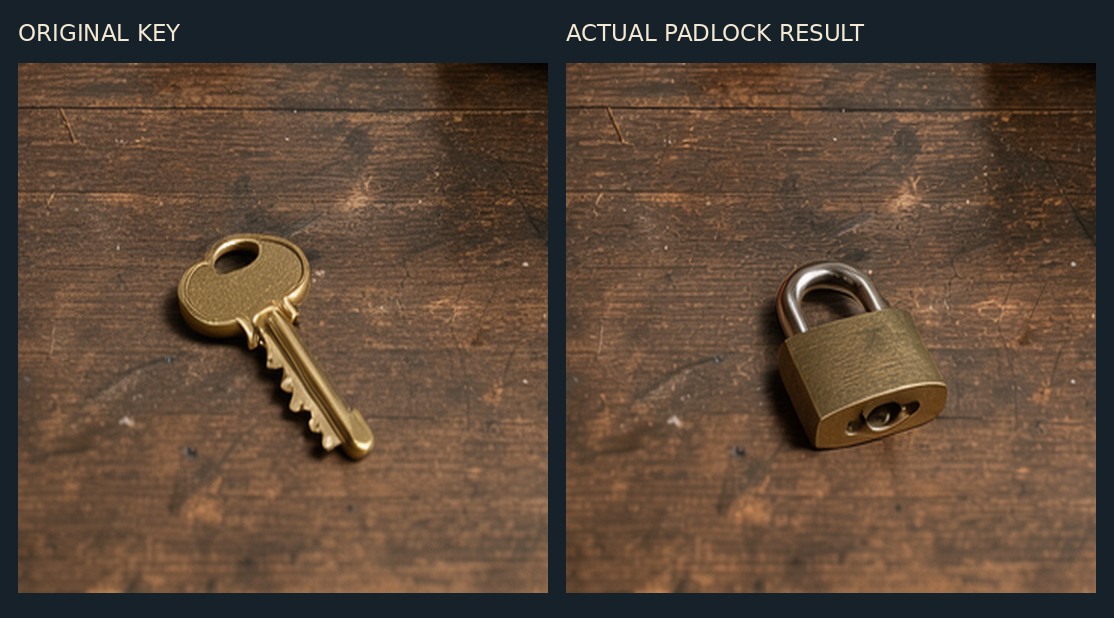
Our result: the first generation replaced the key with a closed padlock near the original position. The red toolbox and blank green monitor stayed recognizable. Fine surface details outside the requested edit still drifted. Returning to the original kept the tests independent; it did not make preservation perfect.
7. Treat an error as an error
Our third request asked for exactly ACCESS DENIED on the monitor. It returned a generic Error, and one identical retry returned Error again. There was no new output and no explanation of the cause.
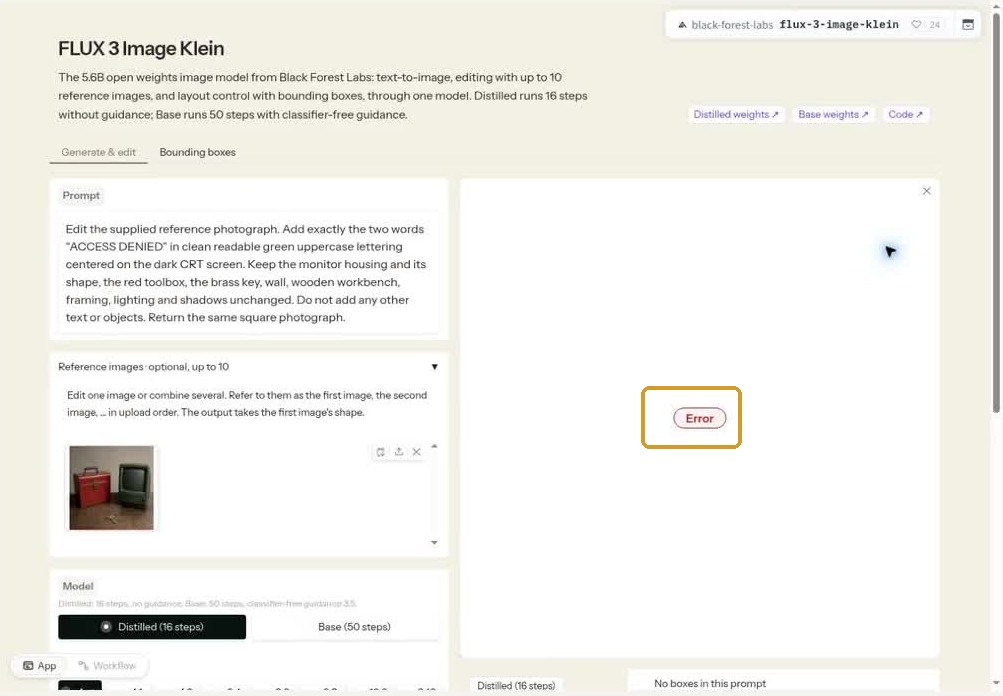
Optional text prompt — outcome unverified: this is what we submitted. You do not need to run it to complete the two successful editing exercises.
Edit the supplied reference photograph. Add exactly the two words “ACCESS DENIED” in clean readable green uppercase lettering centered on the dark CRT screen. Keep the monitor housing and its shape, the red toolbox, the brass key, wall, wooden workbench, framing, lighting and shadows unchanged. Do not add any other text or objects. Return the same square photograph.
This does not establish that the model cannot render text, and it does not establish a quota problem. Neither cause was shown. If an older result remains visible after an error, do not count it as the new request’s output.
8. Save the result and check the saved file
Use the result image’s download control and save the edit under a new name. Keep the original unchanged. Open the downloaded file and check that it is the correct result, not a blank preview or a previous output. In our session, the browser showed download failures even though PNG files arrived, so inspecting the saved files mattered.
For your own image, start with one clear change and repeat the three checks: the target edit, the surrounding objects, and the fine details. Keep a useful result only when it fits the job. When an exact label, scratch pattern, or product feature must remain identical, these two examples give you a reason to inspect carefully before using a generated edit.
What this small test showed
Two requested edits worked; exact preservation did not. The text attempt produced no usable result. That is the full outcome of this session, rather than a claim about every image or every FLUX workflow.
For model details and access conditions, see Black Forest Labs’ official model card and official demo. Screenshots, comparison crops, prompts, and observations in this lesson are from The Click Test’s own work.