

Photopea’s Magic Cut can make a transparent cutout from a simple white-background photo. In the recorded lemon example, it worked, but the soft shadow stayed and a few pale pixels remained around the edge. So: useful tool, imperfect magic.
These steps follow the recorded workflow. Keep your original layer, check the cutout before accepting it, and inspect the exported file before using it elsewhere.
1. Open your photo and keep a safe copy
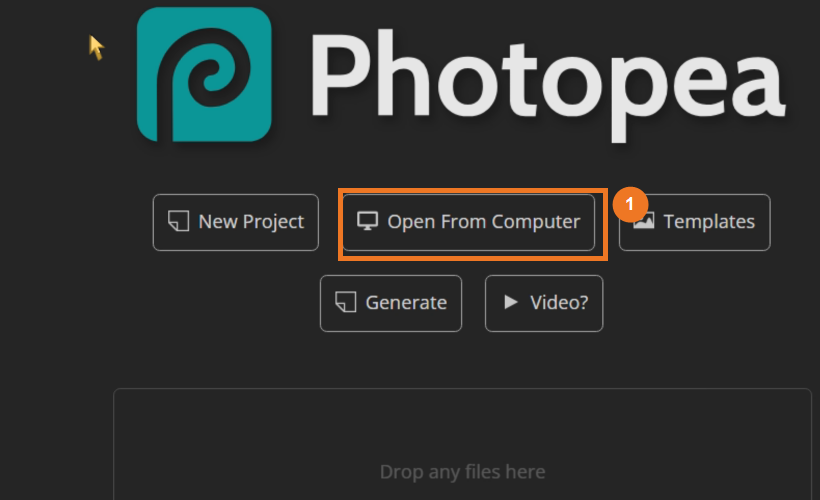
Open Photopea. On its start screen, choose Open From Computer and select your image.
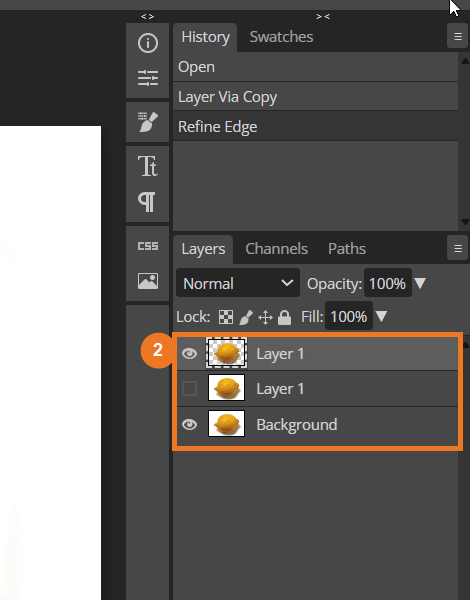
When the picture is open, click its layer in the Layers panel and press Ctrl+J to duplicate it. Leave the original underneath and work on the copy. If an edit goes sideways, you still have a clean starting point.
2. Open Magic Cut
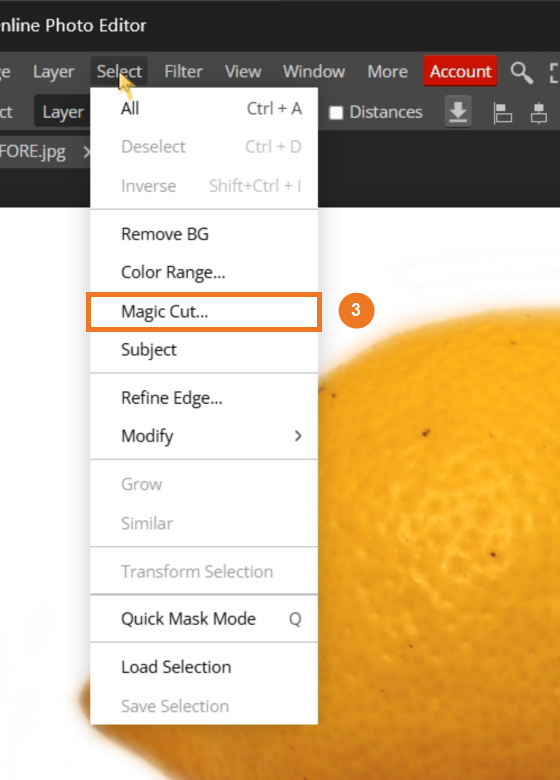
With the copy selected, open Select in the top menu and choose Magic Cut. The left side is where you mark what to keep or remove. The right side previews the cutout.
3. Mark the subject and the background
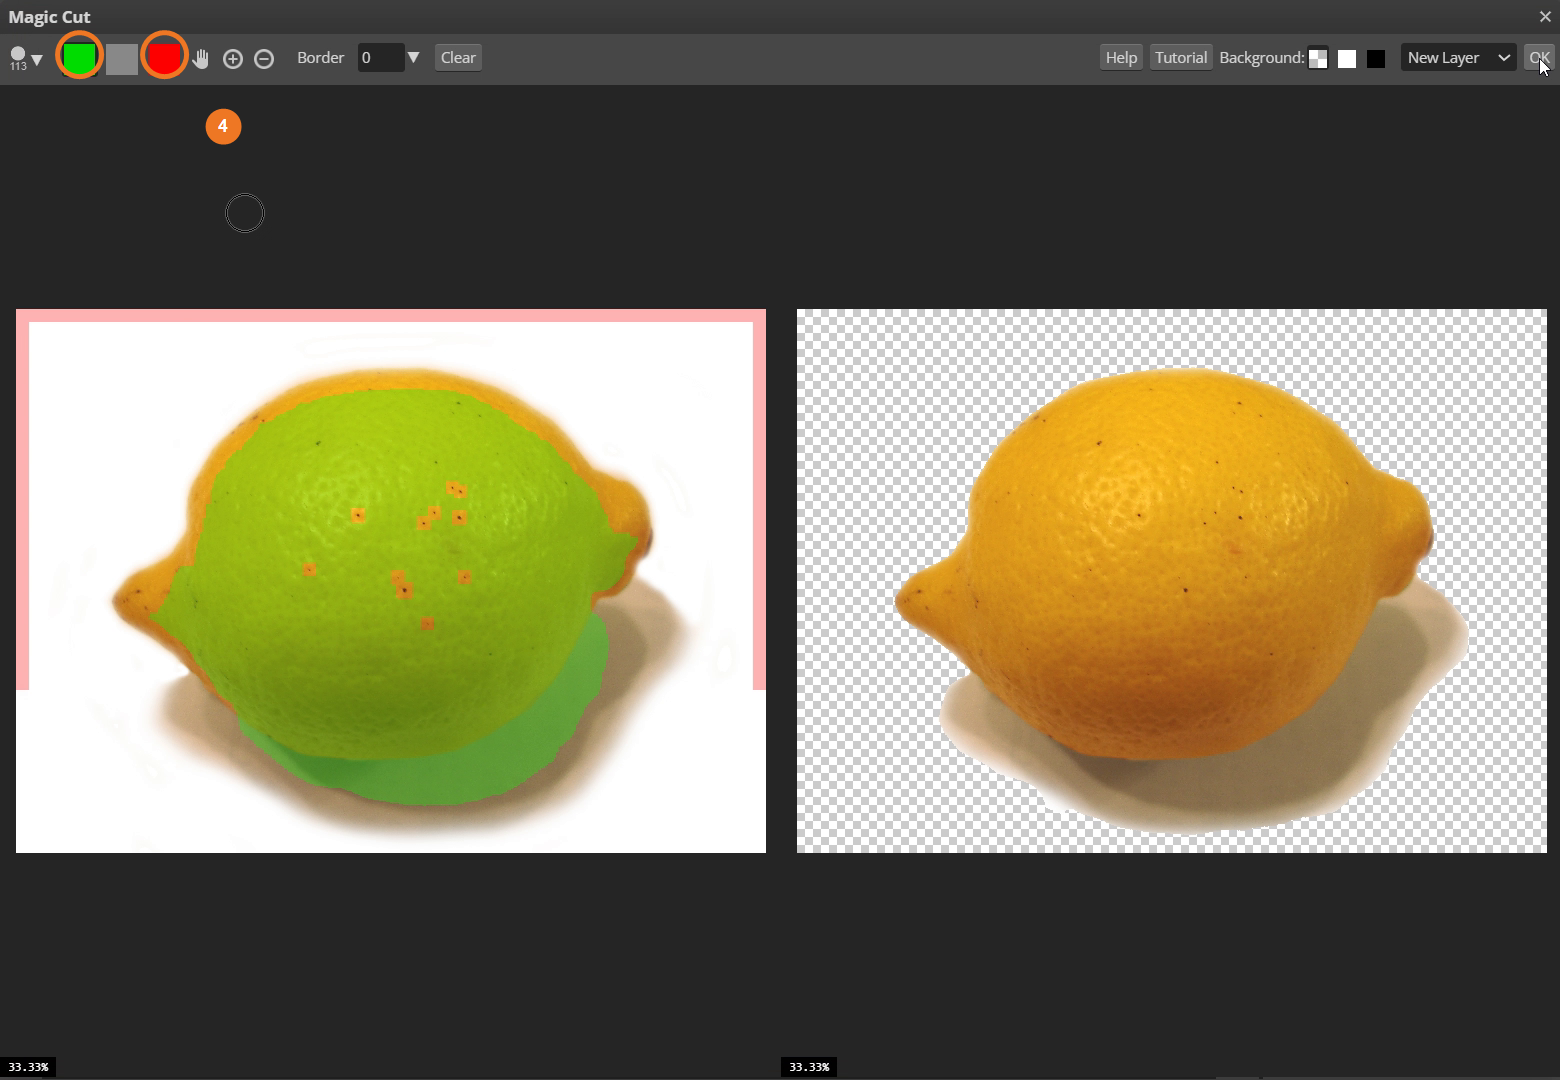
In the left preview, paint over the subject with the green foreground brush. Paint over the background with the red background brush. Then look to the right preview to see what Magic Cut kept.
Use a smaller brush near the edge. If a mark lands on the wrong side, use the gray brush to erase that mark; Clear removes the marks if you want to start them again. Green means “keep,” red means “remove”—easy to remember, and easier to fix than a hurried click.
4. Review the preview and accept it
Take a moment to inspect the whole outline in the right preview. The checkerboard means those pixels are transparent. Look around the tip, edges, and shadow before applying the result.
For this recording, the output menu is set to New Layer. With that option selected, click OK in the upper-right corner.

5. Check the result on the main canvas
Photopea returns to the regular workspace. The checkerboard behind the lemon shows transparent areas, and the Layers panel shows the result above the original. Check the edge at a comfortable zoom before exporting.
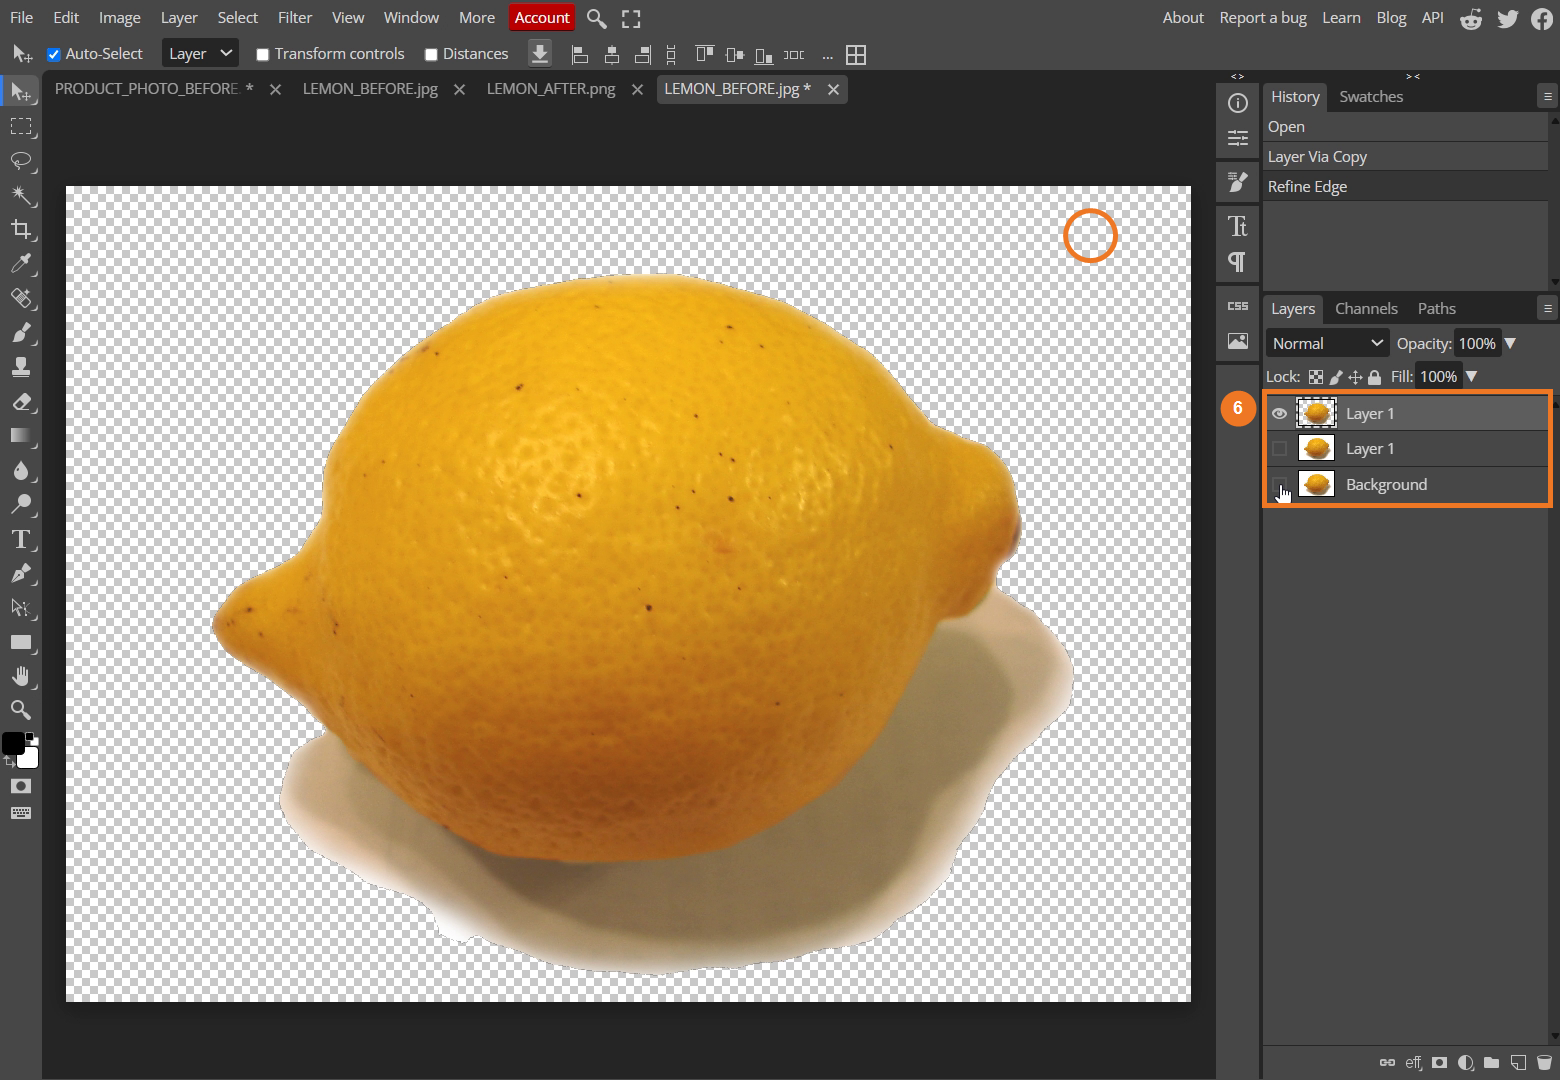
6. Export a PNG
Open File, point to Export As, and choose PNG. Save the exported image where you can find it. PNG supports transparency; JPEG does not.
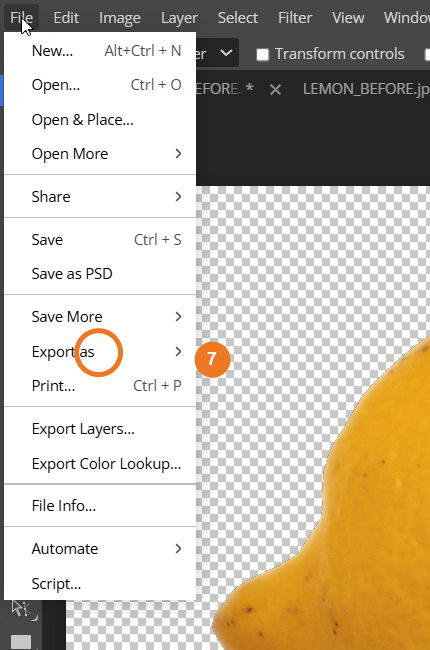
7. Check the saved file
Open the PNG you saved, or place it over a contrasting color. This confirms you are checking the exported file rather than only the editor preview.
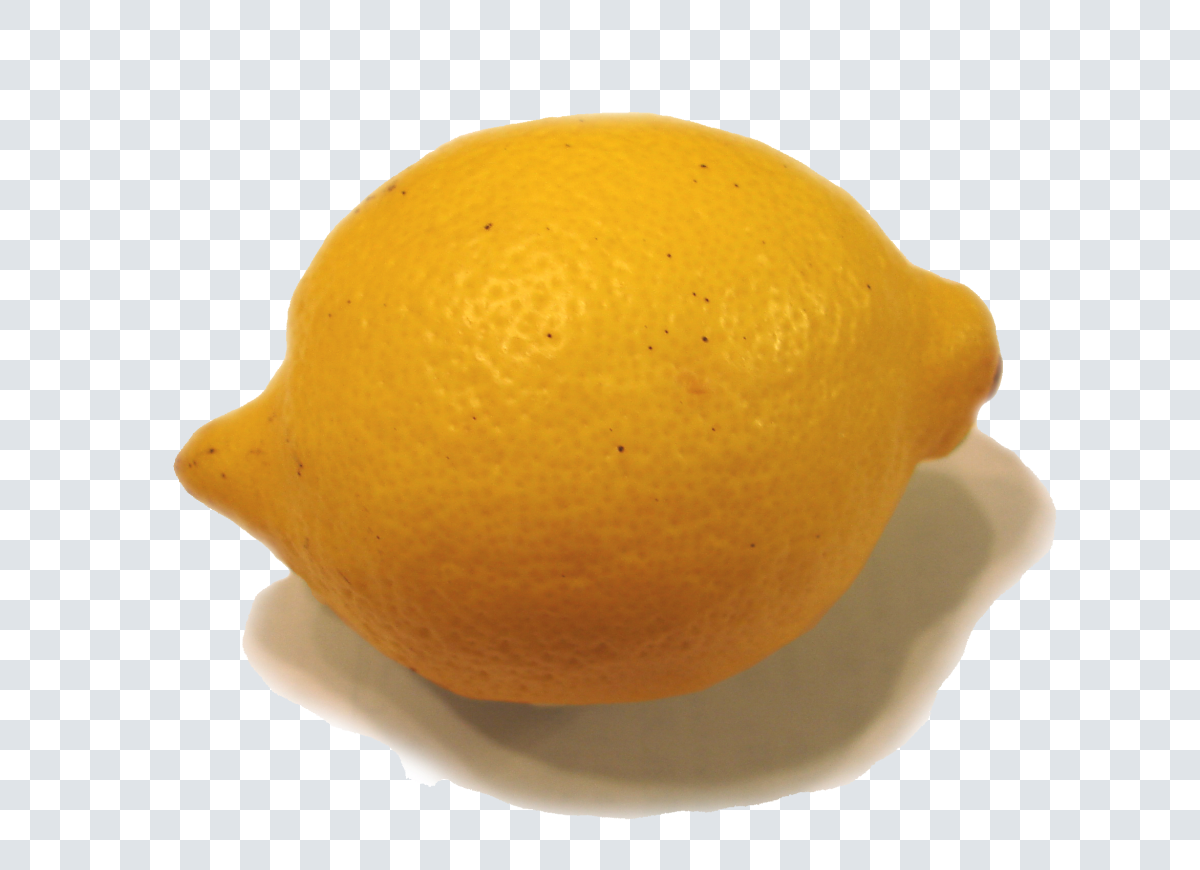
The test file is a 2250 × 1632 PNG with transparency. The remaining shadow and pale edge are good reminders to judge the cutout at the size and against the background where you plan to use it. Magic Cut helped here; it did not make every edge disappear by itself.
If something looks off
- Part of the subject disappears: add a green mark over the area you want to keep, then check the right preview again.
- White background remains: add a red mark over the area you want removed.
- You marked the wrong area: use the gray brush to erase that mark, or choose Clear to reset all marks.
- A shadow or pale fringe remains: inspect it on a contrasting background. The recorded lemon example kept its soft cast shadow and a few light edge pixels.
Keep the original layer until you are happy with the exported PNG. For a plain background and clearly separated subject, this workflow is a handy starting point. Fine hair, translucent objects, and shadows can take more careful cleanup.