

This Excel lesson uses a fictional monthly budget to show how planned and actual spending can sit side by side. You will add a difference for each category, an automatic budget status, and totals that recalculate when an amount changes.
This walkthrough was recorded in Excel for the web. Menu locations can vary by version; if your screen differs, check current Excel help.
Before changing an important workbook, save a copy. Microsoft Support has current guides to the IF function and the SUM function used here.
Open or download the 49-second video lesson.
1. Set up the columns
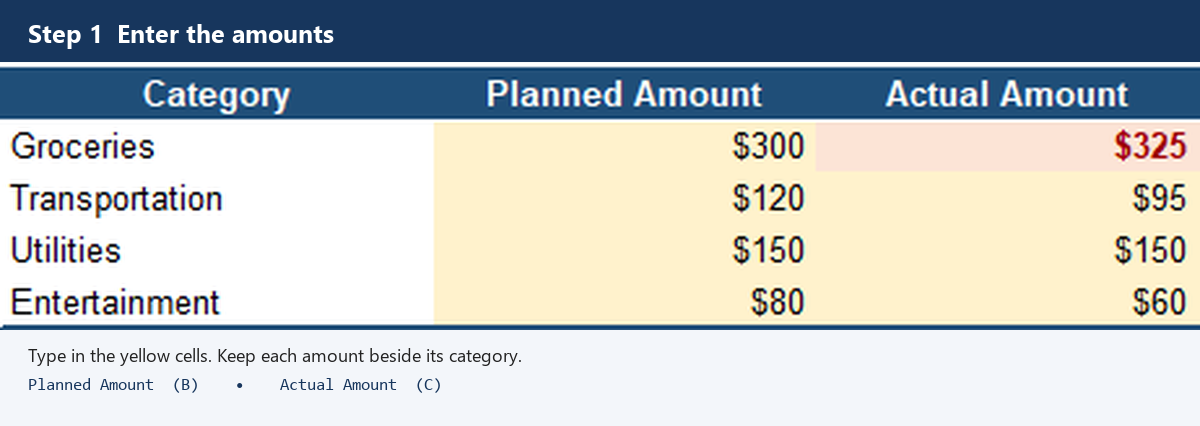
Create columns for Category, Planned Amount, Actual Amount, Difference, and Budget Status. Enter one category and its two amounts on each row. In this example, rows 6–9 hold four fictional categories, and row 10 is reserved for totals. The yellow cells show where to type.
2. Calculate the difference
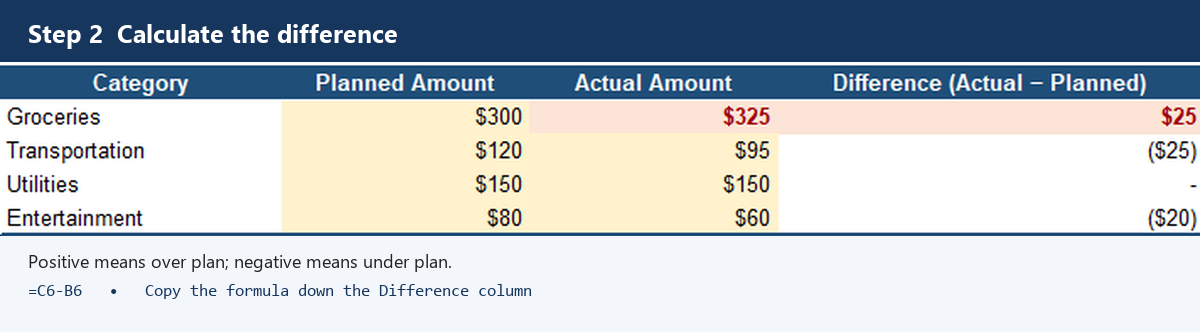
In D6, enter =C6-B6, then copy the formula down the Difference column. It subtracts the planned amount in B6 from the actual amount in C6. A positive result is over plan, a negative result is under plan, and zero means the amounts match.
3. Label each category automatically
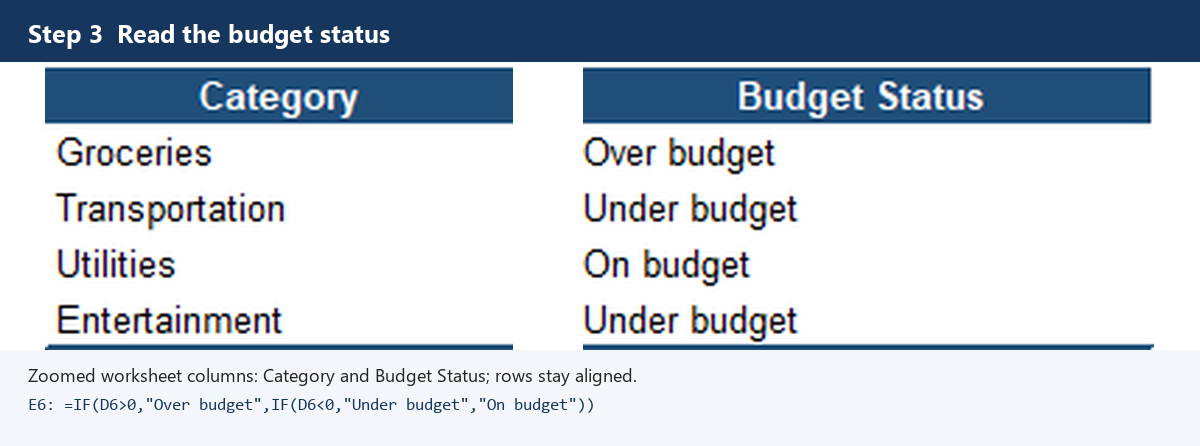
In E6, enter =IF(C6>B6,"Over budget",IF(C6<B6,"Under budget","On budget")), then fill it down. The first IF checks whether actual spending is higher than planned. If it is not, the second IF checks whether it is lower. If neither is true, the amounts are equal, so Excel returns “On budget.”
4. Add planned and actual totals with SUM
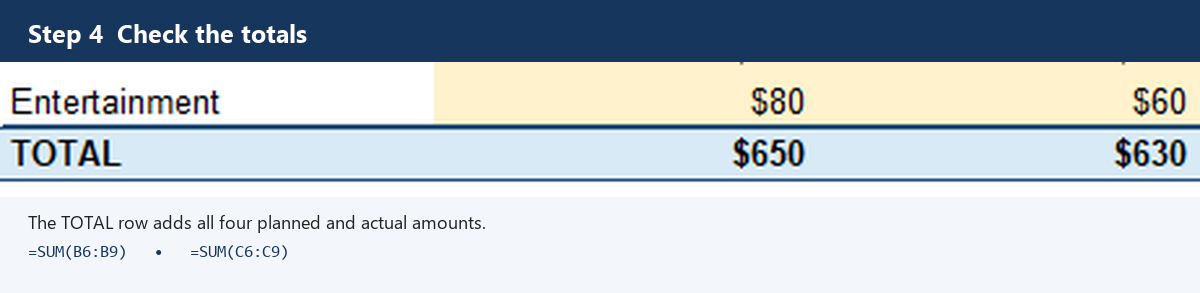
Use =SUM(B6:B9) in B10 to add the planned amounts, and =SUM(C6:C9) in C10 to add the actual amounts. SUM adds every number in the range between its parentheses. The total difference in D10 is =C10-B10.
With the fictional sample values, the planned total is $650 and the actual total is $630. The month is therefore $20 under plan. Groceries is $25 over, while the other categories are under or on plan; the total row shows the net result.
5. Try the practice change
Change Utilities Actual from $150 to $165. Its difference should become $15, its status should switch to “Over budget,” and the actual total should rise to $645. The overall total will still be $5 under plan. Restore the fictional amount to $150 when you are done.
6. Add another category
Copy the Difference and Budget Status formulas into the new category row. Extend both SUM ranges so they include that row, and keep the TOTAL row outside the ranges. This keeps new spending visible in the category comparison and in both totals.
That is the core of the tracker: enter two amounts, read the difference and status, then compare the two SUM totals. All figures in this lesson are fictional examples for learning.